Description: We could not find the original apk, but we got this. Can you make sense of it?
Download APK: https://lautarovculic.com/my_files/challenge3_h1-702.zip

We can see, unzipping the file, two files, base.odex and boot.oat
But, what are these files?
OAT and ODEX files are binary formats used in the Android environment to optimize application execution. Each has a specific purpose related to the performance and precompilation of applications on the system.
ODEX (Optimized Dalvik Executable)
Description
- ODEX files
are optimized versions of DEX(Dalvik Executable) files, which contain the bytecode of Android applications. The system generates these files to improve the startup time of applications by optimizing certain parts of the code.
Purpose
- To reduce the loading time of applications.
- Prevent the Dalvik/JVM virtual machine from having to perform runtime optimization.
Generation
- Prior to Android 5.0 (Lollipop), the dexopt optimizer generated ODEX files during application installation.
Location
- Usually stored in the same directory as the APK or in the system cache (
/data/dalvik-cache)
OAT (Optimized Android Runtime)
Description
- OAT files were introduced with Android 5.0 (Lollipop) as part of the transition from Dalvik to ART (Android Runtime). These files contain precompiled versions of the DEX, but are designed specifically for ART. They can include both the original bytecode and native code optimized for the device architecture.
Purpose
- Improve runtime performance by precompiling applications with
Ahead-Of-Time(AOT) Compilation.
- Reduce resource consumption on devices with limited hardware.
Generation
- During the system installation or upgrade process, the
dex2oatcompiler creates the OAT files.
Location
- In
/data/dalvik-cache/for user applications. - In system partitions (
/system/framework/) for system libraries and applications.

So, this is like a dex file basically.
Then, we can use backsmali tool for get dex file.
baksmali deodex -o output/ base.odex
We get the smali files, so, now we can create the dex file with smali tool.
smali assemble -o base.dex output/
Now we have the base.dex
Now, just use d2j-dex2jar tool for get the java code.
d2j-dex2jar base.dex
I just rename the filename
mv base-dex2jar.jar challenge3_h1.jar
Now, it’s time to use jadx tool.
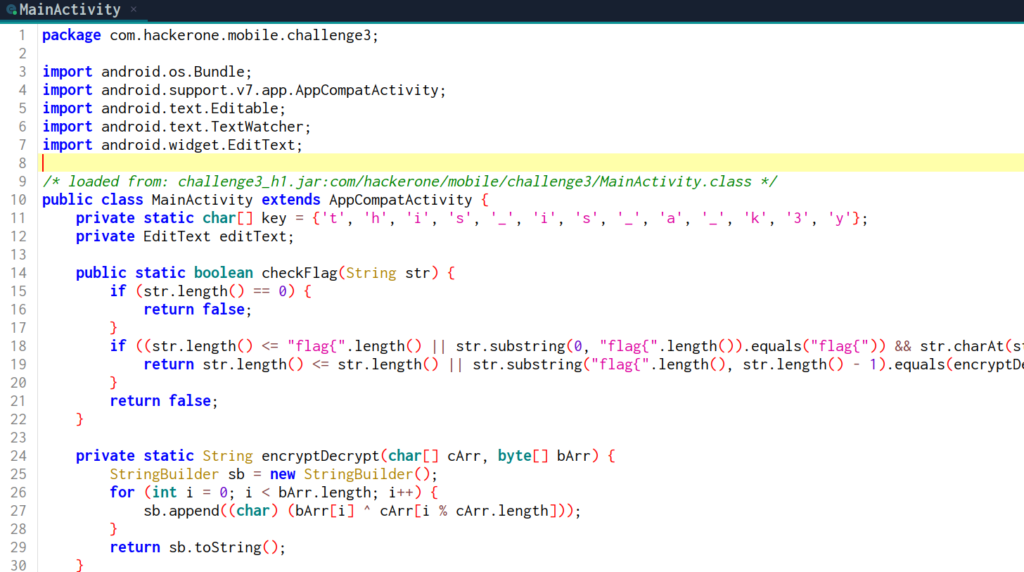
Let’s take a look to the source code.
We can see 3 functions.
checkFlag
This function checks whether the entered string is a valid flag. Inside function, a comparison is made with a value that is generated from the encryptDecrypt function. From the encryptDecrypt function.
encryptDecrypt
This function uses a character array as a key to perform an XOR operation with a byte array. The input for this function is generated from a string that is manipulated (reverse and replace characters).
hexStringToByteArray
Converts a hexadecimal string into a byte array, which is then used in the encryption function.
We can create a java code (MainActivity.java) that do the work for us
					public class MainActivity {
    private static char[] key = {'t', 'h', 'i', 's', '_', 'i', 's', '_', 'a', '_', 'k', '3', 'y'};

    public static String calculateFlag() {
        // Reversed and transformed hex string from the original code
        String reversedString = new StringBuilder("kO13t41Oc1b2z4F5F1b2BO33c2d1c61OzOdOtO")
                .reverse().toString()
                .replace("O", "0")
                .replace("t", "7")
                .replace("B", "8")
                .replace("z", "a")
                .replace("F", "f")
                .replace("k", "e");

        // Convert hex string to byte array
        byte[] decrypted = hexStringToByteArray(reversedString);

        // Decrypt using the provided key
        String decryptedString = encryptDecrypt(key, decrypted);

        // Build the flag in the format "flag{decryptedString}"
        return "flag{" + decryptedString + "}";
    }

    private static String encryptDecrypt(char[] cArr, byte[] bArr) {
        StringBuilder sb = new StringBuilder();
        for (int i = 0; i < bArr.length; i++) {
            sb.append((char) (bArr[i] ^ cArr[i % cArr.length]));
        }
        return sb.toString();
    }

    public static byte[] hexStringToByteArray(String str) {
        int length = str.length();
        byte[] bArr = new byte[length / 2];
        for (int i = 0; i < length; i += 2) {
            bArr[i / 2] = (byte) ((Character.digit(str.charAt(i), 16) << 4) + Character.digit(str.charAt(i + 1), 16));
        }
        return bArr;
    }

    public static void main(String[] args) {
        // Calculate the flag
        String flag = calculateFlag();

        // Print the flag
        System.out.println("The flag is: " + flag);
    }
}
Just compile it with
javac MainActivity.java
And run
java MainActivity
Output:
The flag is: flag{secr3t_littl3_th4ng}
Flag: flag{secr3t_littl3_th4ng}
I hope you found it useful (:
Leave a Reply